
WDT tools for espresso: what they do and whether you need one
What a WDT tool does to your puck, which setups genuinely need one, what to look for when buying, and how to use it without wrecking your shots.
What you'll need
- A WDT tool with 0.3 to 0.4 mm needles : Normcore, MHW-3BOMBER, or a generic Amazon acupuncture-needle tool. $20 to $40. Skip the $100+ designer versions.
- A dosing funnel : Magnetic ring that extends the basket walls. Stacks with WDT to keep grounds off the counter.
- A level tamp : Any tamper works, but a self-leveling or spring-loaded one preserves the even distribution WDT gives you.
- A bottomless portafilter (optional but useful) : Shows you channeling in real time, which is how you tell whether WDT is actually working.
TL;DR
A WDT tool (Weiss Distribution Technique) is a set of thin needles you stir through ground coffee in the portafilter to break up clumps and even out density before tamping. It’s the single cheapest upgrade in espresso, usually $15 to $40, and it eliminates most channeling on most home setups. If you own a single-dose grinder, an electric grinder that clumps, or you pull light-roast shots, you want one. If you own a Breville Barista Express and pull medium roasts and everything already tastes fine, you can skip it, but you probably won’t want to once you try one.
What a WDT tool actually does
Grinders don’t dump neat piles of coffee. They fling ground beans through a chute with static electricity, air currents, and their own retention path, and the grounds land in the portafilter as a lumpy, uneven pile with clumps ranging from single particles to pea-sized clusters. The clumps are denser than the surrounding grounds. When you tamp on top of that mess, the density variations survive: some spots have tightly packed grounds, others have loose pockets, and pressurized water finds the loose pockets first.
That’s channeling: water taking a preferential path through the puck instead of extracting evenly. It’s the single biggest cause of shots that taste sour and bitter at the same time.
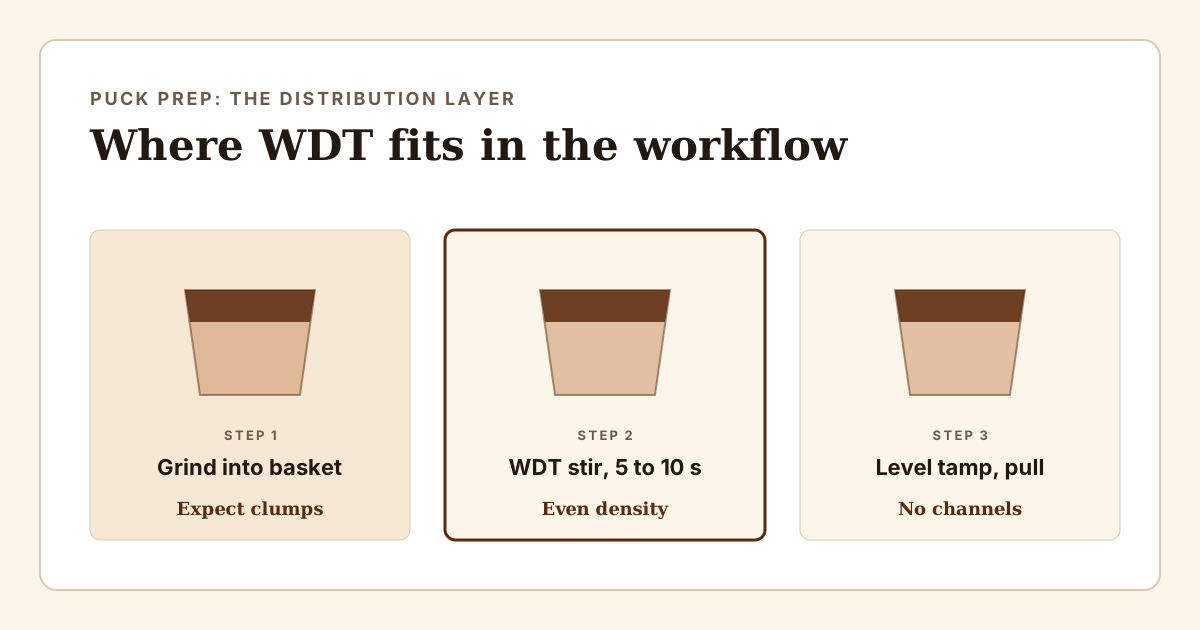
A WDT tool is a handle with five to eight very thin needles (usually 0.3 to 0.4 mm stainless steel wire) sticking out the end. You plunge it into the ground coffee in the portafilter and stir in small circles for 5 to 10 seconds, then lift out. The needles break up the clumps, redistribute the grounds evenly across the basket, and hand you a uniform bed to tamp on. Tamp, lock in, pull. The puck resists water evenly instead of blowing out through a channel.
That’s the entire mechanism. No magic, no marketing.
When you actually need one
You need a WDT tool if any of these are true:
You own a single-dose grinder. Single-dosers (Niche Zero, DF64, Kingrinder hand grinders, Weber Key) hold no grounds between shots by design. That means each dose gets flung out in one continuous burst, and static grabs the last few grams and drops them as clumps. Every single-dose grinder clumps. Not “sometimes,” always. WDT is mandatory equipment for these grinders.
You pull light roasts. Light roasts are harder, denser, and more brittle. They fracture into a bimodal particle distribution (lots of fines, lots of boulders) that clumps aggressively and channels easily. If your bean is roasted lighter than a typical Starbucks, you’ll see the difference on the first WDT shot.
You use a bottomless portafilter and see spritzers or side-jets. That’s channeling, live, on video. Fix your distribution before you fix anything else.
Your shots taste sour and bitter at the same time. Not sour OR bitter (those are under-extraction and over-extraction respectively, both recipe problems), but both flavors in the same sip. That’s channeling, a puck-prep problem, not a grind or ratio problem.
You want repeatable shots. Even if a given shot tastes fine without WDT, the shot-to-shot variance drops noticeably with it. This matters more than raw quality if you’re trying to dial in cleanly, because dialing in with a moving distribution baseline is close to impossible.
When you can honestly skip it
Breville-style hopper grinders with the internal doser. The Barista Express, Barista Pro, and similar all-in-one machines have a small doser that dumps grounds fairly evenly into the portafilter. Combined with the razor tool for leveling, they produce acceptable pucks without WDT. Not great, but acceptable. If you’re pulling medium roasts and don’t taste channeling, you can defer the purchase.
Very dark, oily roasts. Dark roasts are less brittle, produce fewer fines, and clump less. They also mask distribution errors because they extract fast and forgivingly. WDT still helps, but the benefit is smaller.
Any workflow where the shots are already balanced and consistent. If your bottomless shots are even, the crema is uniform, and the taste is where you want it, distribution is already working. Don’t fix what isn’t broken.
Notice what’s not on this list: “I have a good grinder, so I don’t need one.” Grinder quality affects particle size distribution, not clump behavior. A $2,000 Monolith Flat still throws clumps into the basket. Every grinder clumps to some degree.
What to look for in a tool
The tool itself is simple, but the details matter:
Needle diameter: 0.3 mm to 0.4 mm. Thinner needles pass between grounds without shoving them around; thicker ones plough. 0.35 mm is the modern consensus. Toothpicks and paperclips (the DIY starter versions) are 1 mm+ and mostly move coffee around rather than mixing it. They work, but not as well.
Needle count: 5 to 8. More needles is not better past 8; you’re just adding drag. Five works for a 58 mm basket, seven or eight is fine.
Needle length: needs to reach the bottom of the basket. For a standard 58 mm double basket, that’s roughly 60 mm of needle exposed. Some cheap tools have short needles that only stir the top layer; useless.
A depth stop or collar. Prevents you from jamming the needles into the basket screen holes and bending them. Most $25+ tools have this. The under-$10 knockoffs often don’t.
Weighted handle, optional. Nice ergonomics but doesn’t affect the puck. Don’t pay $80 for a “premium” WDT tool; the $25 Normcore or generic Amazon versions work identically.
Recommended: any acupuncture-needle-based tool in the $20 to $40 range. Normcore, MHW-3BOMBER, or a generic knockoff with 0.35 mm needles and a depth collar. The $80 to $150 “designer” tools (Levercraft, Duomo) are lovely objects but pull the same shots.
How to actually use one
- Grind into the portafilter as usual.
- If you have a dosing funnel (the little magnetic ring that extends the basket walls), snap it on. Prevents overflow.
- Insert the WDT needles into the coffee, all the way to the bottom of the basket.
- Stir in small circles for 5 to 10 seconds. Not aggressive stirring: you’re mixing, not whipping. Move around the basket so every zone gets touched.
- Lift straight up and out. Give the portafilter one gentle tap on the bench to settle the bed flat.
- Tamp level. Levelness matters more than pressure; a cocked tamp reintroduces the channeling you just prevented.
Total time added to your workflow: about 10 seconds. Learning curve: one shot.
Common mistakes
Stirring too aggressively. Whipping the needles around throws coffee out of the basket and creates air pockets that collapse during tamping. Slow, deliberate circles are the goal.
Not going deep enough. If the needles only reach halfway down the basket, the bottom half stays clumpy and channels there. Needles must touch the basket floor (or the depth stop should be set for it).
Using WDT as a substitute for a dosing funnel. WDT redistributes what’s in the basket; it doesn’t put grounds back that fell on the counter. If your grinder throws grounds around, get a dosing funnel too. They cost $10 and stack with WDT.
Assuming WDT fixes a wet or clumpy grinder. It reduces the symptoms but doesn’t cure them. If your grinder is producing golf-ball-sized clumps because the burrs are dull or the retention path is caked with old grounds, clean or replace the burrs. WDT is a distribution tool, not a mitigation for broken equipment.
Buying an expensive tool before other basics. A $150 WDT tool with a $50 grinder is upside-down spending. If you don’t have a decent grinder yet, see how to choose an espresso grinder first. Grinder before WDT, WDT before puck screen, puck screen before a fancy tamper.
Troubleshooting
My shots still channel after adding WDT. Two likely causes. First, tamp levelness: a cocked tamp reintroduces the density variation WDT removed. Use a self-leveling tamper or watch yourself in a mirror for a shot or two. Second, dose: an overfilled basket has no headspace, gets crushed against the shower screen when you lock in, and channels no matter how well distributed. Weigh the dose and back off 0.5 g if you’re at the ragged edge of the basket capacity.
The needles bent on my first use. You jammed them into the basket screen holes. Get a tool with a depth collar, or set the exposed length so the tips stop 1 mm above the basket floor. Bent needles can sometimes be straightened by hand, but a bundle that keeps bending is done.
Coffee flies everywhere when I stir. You’re stirring too fast, or your basket is overfilled with no dosing funnel. Slow down and add a funnel. The stir should look bored, not vigorous.
I got a WDT tool and now my shots run slower, or choke. Correct and expected. Channels were letting water shortcut through the puck, which made your old shots run faster than the puck’s true resistance. With the channels gone, the water has to pass through the whole bed and the shot slows down. Grind one notch coarser to compensate; you’ll land back at your target time with a better-tasting shot.
Do I still need to tap or “Stockfleth” after WDT? No. WDT replaces those older distribution techniques. A single gentle tap to settle the bed flat is fine, but the tapping-and-swiping choreography some tutorials show is redundant once you’re stirring the grounds directly.
Puck screens: do those replace WDT? No. A puck screen sits on top of the tamped puck and helps distribute water from the shower screen; it does nothing about the density variations inside the puck. Puck screens and WDT solve different problems. Use both if you like, but skip a puck screen before you skip WDT.
Frequently asked
Does WDT actually make a taste difference or just a visual one?
Both. Bottomless shots visibly stop spritzing, but the cup difference is real too: cleaner sweetness, less muddled bitterness, and better repeatability from shot to shot. The effect is biggest on light roasts and single-dose grinders, smallest on dark roasts through a Breville hopper.
Can I just use a paperclip or a bent needle from a sewing kit?
Yes, that's the original DIY version and it works better than nothing. The limitation is thickness: a paperclip is around 1 mm, which pushes grounds around rather than passing between them. A single sewing needle or acupuncture needle (0.3 mm) taped to a chopstick is closer to a real tool. If you want to test the concept before spending $25, start there.
How long do the needles last?
Years, if you don't bend them by stabbing into the shower screen holes. A depth stop or collar prevents this. A single bent needle can be straightened; if half the bundle is bent, replace the tool.
Should I use WDT before or after weighing the dose?
After. Grind, weigh to confirm the dose is where you want it, then WDT. Doing it before weighing risks spilling grounds when you tap or level, which throws off the dose.
My grinder has anti-static features. Do I still need WDT?
Anti-static (RDT water spritz, ionizers, grounded chutes) reduces the static that causes clumping, but doesn't eliminate the mechanical clumps that form inside the grinder. Anti-static plus WDT works better than either alone. Don't skip WDT just because your grinder markets itself as clump-free.